Studio Lighting Initial Research
After deciding that I wanted to shoot this project in the studio, I realised how little studio work I’ve done recently, as my work has been on location and mainly on film using natural light. I realised I needed to do some research on lighting styles before venturing in the studio as I have little skills on styles and positioning of the lights.
I liked Chiaroscuro oil painting technique from previous creative work, and decided that this would be the first way I would light my models in the studio. This was due to the strong tonal contrasts between light and dark, which, if used effectively, created sharp, shadows and bright light that picked up the focus of the image very obviously. I also did research into both portrait paintings and still life paintings using this technique, so I could follow and mirror the lighting used in the studio. The underlying principal of chiaroscuro technique is that the crispness and solidity of form is best achieved by light falling against it, so I decided to start lighting my portraits with one strong light coming from side on, falling against the model and creating bright light on their face and hair and dark shadows on the other half of the body and background. I will also use this technique for still life images, pointing the light from the side to illuminate the subject, and keep the background dark and slick.
I am going to try out chiaroscuro lighting technique to begin with, playing around in the studio using film and digital, to explore this style, before deciding whether the increased lights and darks capture the subjects correctly, or whether I should move onto different studio lighting styles, such as advertising lighting, commercial work.
Chiaroscuro Examples in Painting
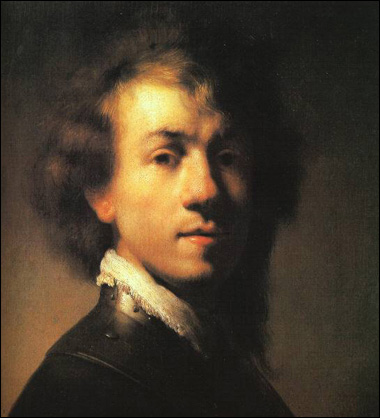
Self Portrait by Rembrant
This painting is lit from the left so that darker shadows can cast over the right hand side of the face. I want to employ this lighting style within my photographs, placing a studio light on the left hand side with a strong beam, so that the shadows on the right hand side help to give shape and dimension to an already 2D image. |

The Young Singer by Georges de La Tour
This painting is similar to Rembrant's self portrait, however the light is on most of the face and body, with none falling back onto the background. I feel as though this painting effect is really successful as it pops the subject out from the dark background, focusing only on the subjects face and body. I will try and reapply this lighting style in the studio, however rather than lighting the body properly, I will make sure the hair is brightly lit as obviously that is the focus of my images, and obviously not the focus of this painting. |
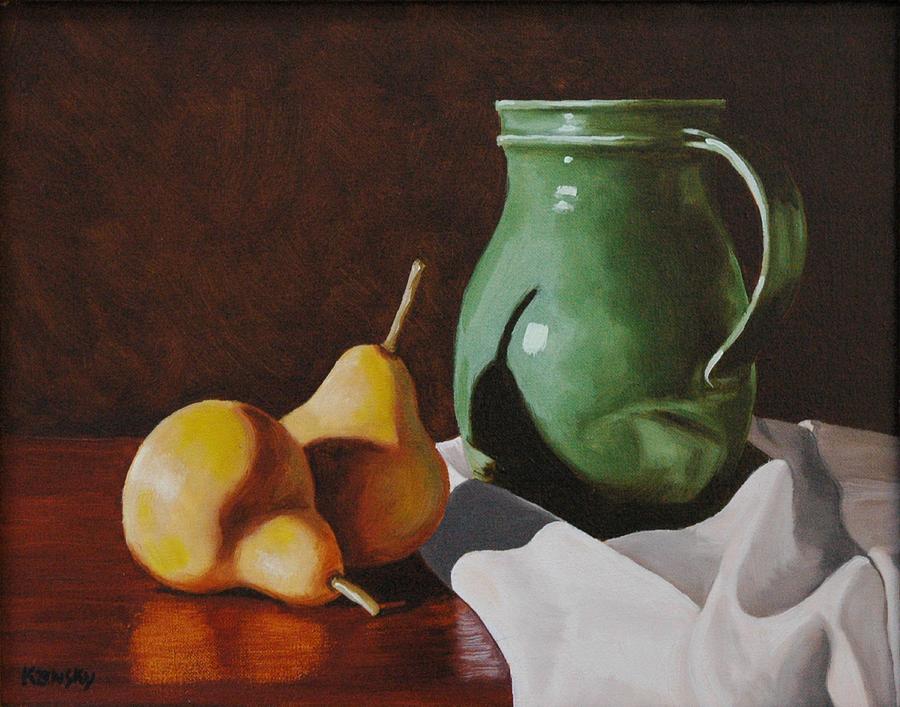
Pears With Water Jug Still Life is a painting by Daniel Kansky
For my still life shoots, I want to also use this style lighting, with strong lighting from one side that casts and creates shadows on the other side of the subjects, creating depth within what is usually 2D images. In terms of lighting, I an inspired by this style of chiaroscuro contrasting tones, but I am also intrigued by how the objects are placed on the table within this still life, obviously considered but very casual, casting shadows from one image onto another and using two different coloured surfaces to place the images onto. I will also apply this method to the composition of my images, placing the objects very casually on the table, allowing them to merge together with other objects, and also use a different colour surface to my background to add more depth to the image, shooting as if I were in a corner or on a table, as well as having the colour flowing from background to surface.
For my still life shoots, I want to also use this style lighting, with strong lighting from one side that casts and creates shadows on the other side of the subjects, creating depth within what is usually 2D images. In terms of lighting, I an inspired by this style of chiaroscuro contrasting tones, but I am also intrigued by how the objects are placed on the table within this still life, obviously considered but very casual, casting shadows from one image onto another and using two different coloured surfaces to place the images onto. I will also apply this method to the composition of my images, placing the objects very casually on the table, allowing them to merge together with other objects, and also use a different colour surface to my background to add more depth to the image, shooting as if I were in a corner or on a table, as well as having the colour flowing from background to surface.
